Health & Wellness
The Secret To Staying Fit During The Holiday Season

The countdown to the end of the year is well underway. Even as you try to squeeze in just a little more progress toward fulfilling your 2020 New Year’s resolution, however, you may find yourself being tempted left and right by everything the holidays have to offer. From boozy holiday happy hours and festive family parties to unlimited access to sweet holiday treats, the final weeks of the year are a metaphorical minefield of challenges that can trip you up in your quest to stay fit.
There’s no secret to staying fit and healthy. The truth is it takes a lot of hard work and dedication. Unfortunately, the holiday season has a way of wearing down your resolve. Before you know it, you’ve gone back to the buffet table for seconds (or thirds) and you’ve downed three glasses of eggnog.
Staying fit during the holidays can be a challenge, but a little preparation goes a long way. Here are some simple tips to help you stay fit and healthy throughout the holiday season and into the new year.
Table of Contents
Stick to your workout routine (or make adjustments)

Staying active is the key to maintaining your physical fitness, but it can be a challenge during the holidays. It’s cold outside, you’re exhausted from all the holiday planning, and your gym’s hours have changed (if it’s even open at all). Now is the perfect time to adjust your routine to inject a little energy into your workouts. Try an at-home fitness plan or join a virtual group fitness class. It might even be best to give your body a bit of a break from the gym and keep it simple with a daily walk or jog.
Find new ways to motivate yourself
Once you’ve committed to a workout plan, all you have to do is stick to it. Unfortunately, that’s often easier said than done. When the chaos of the holidays really starts to settle in, you may find you simply don’t have the energy to power through a workout after spending budgeting for gifts, organizing holiday parties, or making travel plans. Find a way to motivate yourself when times get tough, even if it’s something silly. Buy a new pair of workout leggings, create an energizing playlist, or stock up on fruit to blend with your favorite protein or collagen supplement for your post-workout recovery shake.
Keep your mental health in balance

Even as you’re working to improve your physical health, it’s important to focus on your mental health as well. The holidays are a wonderful time of year, but they can be stressful as well. Make self-care a priority and learn to recognize your limits – it’s okay to say no! You may find it helpful to establish a nighttime routine to wind down at the end of the day. Spend thirty minutes reading or simply relax with a cup of calming tea in front of the fire. Give your mind time to settle down before you go to bed, so you get a good night’s sleep and have the energy you need to power through the next day.
Try to exercise in the morning
Even if you’re not a morning person, you’ll be glad you got your workout over and done with at the start of the day. Working out in the morning means you don’t have to sacrifice holiday festivities to squeeze it in later. If you struggle to get out of bed in the morning, set your coffeemaker to start automatically 20 minutes before your alarm goes off so you can go from covers to coffee in an instant. Aim for at least 20 to 30 minutes of exercise each morning or extend the workout to 45 minutes on days when you have the energy. Find a podcast, playlist, or TV show you enjoy to make the mornings more bearable.
Fuel your body with healthy nutrition

The holidays are a time of tradition and many traditions take the form of food. Even as you enjoy holiday favorites like roast beef with gravy, gingerbread cookies, and spiked eggnog, make sure you’re giving your body the nutrition it needs. Choose healthy foods when possible, loading up your plate with protein, veggies, and whole grains before heading back for dessert. If you’re heading to a holiday party, have a healthy snack before you go so you won’t be so hungry when you get there.
Be mindful of calorie intake (especially alcohol)
Moderation is the key to enjoying all the holidays have to offer without throwing your health and fitness goals out the window. Take small servings at the buffet table to ensure you get a taste of everything without eating a whole day’s worth of calories in one meal. Be particularly mindful of alcoholic beverages because they’re full of empty calories. Maybe sip on a glass of red wine instead of a mug of spiked eggnog or forego the alcohol altogether and go for a glass of club soda with lime.
Burn extra calories with seasonal activities

Squeeze as much holiday fun into the season as possible without giving up on your goals by turning seasonal activities into workouts. Skating, sledding, and even burn more calories than you may realize. If you’re struggling to stay motivated with your workouts or simply looking for a way to shake things up, grab a friend and spend the afternoon at the skating rink. Try to include a seasonal activity each week to add variety to your workout routine while making the most of the holiday season.
Being healthy is as much a mindset as anything else, and you have the power to make choices that either support your health or detract from it. There’s no reason you can’t take part in holiday festivities AND stay true to your health and fitness goals, even if it means tweaking those goals to make them a little more manageable. Start with these simple tips and stay strong. Happy holidays!

Nupur
Nupur is a graduate from Delhi University and is a passionate writer. Very fond of reading books and listening to old songs!


Health & Wellness
Lotus Seeds Benefits: Nature’s Power Snack for Mind and Body
Lotus seeds, commonly known as makhana or fox nuts, come from the lotus flower — a symbol of purity and strength in many cultures. These small, white seeds are not just crunchy snacks but powerful sources of nutrition.
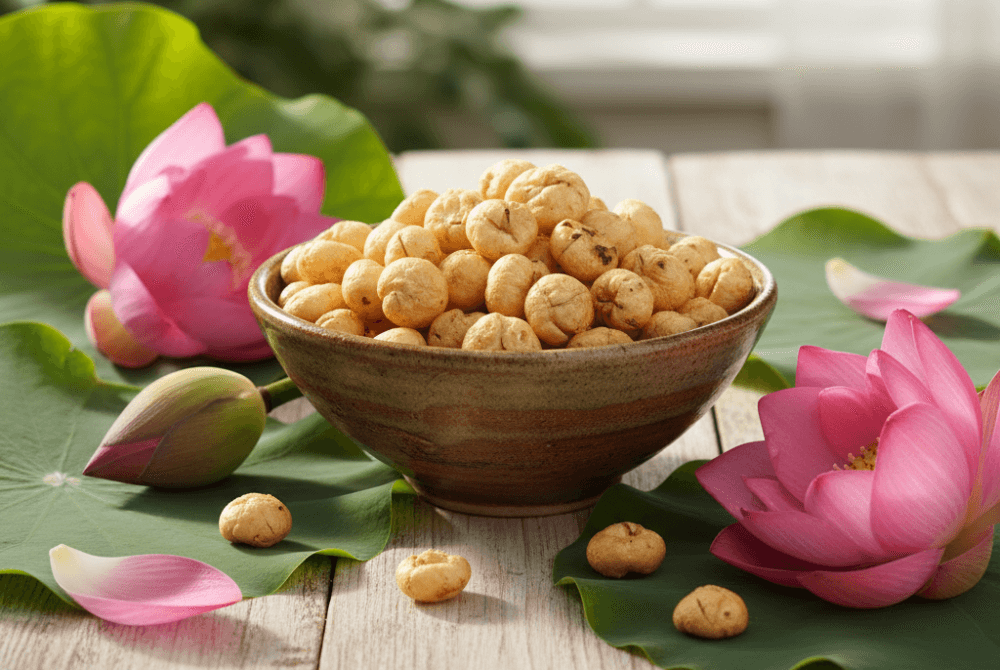
Lotus seeds, commonly known as makhana or fox nuts, come from the lotus flower — a symbol of purity and strength in many cultures. These small, white seeds are not just crunchy snacks but powerful sources of nutrition. Ancient Ayurvedic and Chinese medicine have praised them for their healing properties for centuries. Today, lotus seeds are making a strong comeback as one of the most loved superfoods for health-conscious individuals.
Let’s uncover the science-backed and traditional benefits of lotus seeds and why they deserve a place in your daily diet.
Table of Contents
- 1 Nutritional Value of Lotus Seeds
- 2 Top Health Benefits of Lotus Seeds
- 2.1 Boosts Heart Health
- 2.2 Aids in Weight Management
- 2.3 Promotes Digestive Health
- 2.4 Helps Regulate Blood Sugar Levels
- 2.5 Supports Better Sleep and Reduces Stress
- 2.6 Keeps Skin Youthful and Glowing
- 2.7 Strengthens Bones and Joints
- 2.8 Boosts Immunity and Energy
- 2.9 Supports Kidney and Liver Function
- 2.10 Enhances Reproductive Health
- 3 How to Eat Lotus Seeds
- 4 Frequently Asked Questions (FAQs)
- 5 Conclusion
Nutritional Value of Lotus Seeds
 Lotus seeds are light, low in calories, and packed with essential nutrients like:
- Protein and fiber: for sustained energy and good digestion
- Magnesium, potassium, and phosphorus: for heart and bone health
- Calcium and iron: to support blood circulation and bone strength
- Antioxidants like flavonoids: to fight cell damage and aging
This unique nutritional profile makes lotus seeds a complete snack that nourishes your body without adding unnecessary calories or fats.
Top Health Benefits of Lotus Seeds
Boosts Heart Health
Heart health is one of the key areas where lotus seeds shine. They are rich in magnesium and potassium, both of which play a crucial role in maintaining healthy blood pressure levels. Magnesium helps relax the blood vessels, improving circulation and reducing the risk of hypertension.
Additionally, the antioxidants in lotus seeds protect the arteries from oxidative stress and inflammation, which are common causes of heart diseases. They also help lower bad cholesterol (LDL) and boost good cholesterol (HDL), keeping your cardiovascular system in balance.
Including lotus seeds in your diet can therefore promote better heart function, prevent blockages, and reduce the long-term risk of stroke and heart attacks.
Aids in Weight Management
Lotus seeds are the perfect guilt-free snack for anyone looking to maintain or lose weight. They are low in calories and fat but high in protein and fiber, which means they keep you full longer while supporting muscle growth and metabolism.
The fiber in lotus seeds helps slow down digestion, reducing sudden hunger pangs and keeping your appetite under control. Unlike chips or sugary snacks that cause energy crashes, lotus seeds release energy gradually, providing sustained fuel throughout the day.
Pair roasted makhana with green tea or a light smoothie, and you’ve got a wholesome, weight-friendly snack that nourishes your body without extra calories.
Promotes Digestive Health
 Good digestion is essential for overall wellness, and lotus seeds play a gentle yet effective role in maintaining it. The dietary fiber in makhana supports regular bowel movements and helps prevent constipation. It also acts as a prebiotic, feeding healthy gut bacteria and supporting better nutrient absorption.
Moreover, lotus seeds are known for their cooling and detoxifying properties, which help soothe acidity, heartburn, and inflammation in the gut. Regular intake can help calm the digestive system, reduce bloating, and support smoother digestion naturally.
If you often face indigestion or irregular bowel movements, snacking on a handful of lotus seeds can be a natural, easy solution.
Also Read: Fennel Seeds Benefits: A Super Spice for Digestion, Hormone Balance & Overall Wellness
Helps Regulate Blood Sugar Levels
One of the most impressive benefits of lotus seeds is their low glycemic index (GI), which means they release glucose slowly into the bloodstream. This helps maintain stable blood sugar levels and prevents sudden spikes or drops in energy.
The magnesium and fiber in lotus seeds also contribute to improved insulin sensitivity, allowing your body to use glucose more effectively. This makes makhana a great snack for people with diabetes or those trying to prevent it.
Replacing refined carbs or sugary snacks with roasted lotus seeds can help control cravings and keep blood sugar levels balanced throughout the day.
Supports Better Sleep and Reduces Stress
Lotus seeds contain a natural compound called tryptophan, which promotes the production of serotonin — a hormone responsible for mood regulation and relaxation. Eating lotus seeds can therefore help reduce anxiety, stress, and irritability.
Additionally, these seeds have mild sedative properties that support better sleep patterns. Consuming a small bowl of makhana before bedtime can calm your mind, relax your nerves, and help you drift into a peaceful sleep.
For people dealing with insomnia or stress-related fatigue, adding lotus seeds to your evening routine can make a noticeable difference.
Keeps Skin Youthful and Glowing
 Lotus seeds are a secret weapon for healthy, glowing skin. They are packed with antioxidants and amino acids that help fight free radicals — the main culprits behind premature aging, wrinkles, and dullness.
Antioxidants like kaempferol repair damaged skin cells and improve skin elasticity, giving you a natural glow. The protein and collagen-boosting compounds present in makhana also help tighten the skin and reduce fine lines.
When combined with a balanced diet and good hydration, lotus seeds can help you maintain radiant, youthful skin naturally — from the inside out.
Strengthens Bones and Joints
With age, bone density often decreases, leading to weakness and joint discomfort. Lotus seeds are rich in calcium, phosphorus, and magnesium, which are essential minerals for maintaining strong bones and preventing bone-related disorders like osteoporosis.
Their anti-inflammatory properties also help reduce joint stiffness and swelling, improving mobility. Regular consumption can strengthen bone tissues, making them especially beneficial for older adults and women after menopause.
So if you want to keep your bones strong and flexible, adding a handful of makhana to your daily diet is a wise choice.
Boosts Immunity and Energy
Lotus seeds act as a natural energy booster, providing steady fuel without sugar crashes. They contain complex carbohydrates and natural antioxidants that help your body stay active and fight fatigue.
These antioxidants strengthen your immune system by protecting cells from oxidative stress and inflammation. The presence of micronutrients like zinc and iron supports the production of white blood cells, which defend your body against infections.
Incorporating lotus seeds into your breakfast or snacks can keep you energized and resilient all day long.
Supports Kidney and Liver Function
 Lotus seeds are known for their detoxifying properties, which help cleanse the body of toxins and support liver and kidney health. They act as a mild diuretic, promoting the elimination of excess fluids and reducing water retention.
In Ayurvedic practices, lotus seeds are used to balance body heat and improve urinary health. Regular consumption supports better metabolic waste removal and reduces the load on vital organs like the liver and kidneys.
This cleansing action not only boosts internal health but also contributes to clearer skin and improved digestion.
Enhances Reproductive Health
Traditionally, lotus seeds have been used as a natural tonic for reproductive wellness. They are believed to improve vitality, stamina, and hormonal balance in both men and women.
In women, lotus seeds may help relieve symptoms of PMS and regulate menstrual cycles due to their calming properties. For men, the protein and essential nutrients in makhana support stamina and overall reproductive health.
Including lotus seeds in your diet regularly helps restore balance to the body’s reproductive system and supports long-term vitality.
How to Eat Lotus Seeds
You can enjoy lotus seeds in several delicious ways:
- Roasted makhana: Lightly roast with ghee or olive oil and add a pinch of salt or turmeric for a crispy snack.
- Sweet treat: Mix with jaggery and coconut for a healthy dessert.
- Makhana kheer or curry: Add soaked seeds to milk or gravy dishes for a creamy texture.
- Smoothies: Blend soaked lotus seeds with fruits and nuts for a nutritious breakfast drink.
Frequently Asked Questions (FAQs)
- Can I eat lotus seeds daily?
Yes, you can safely eat one to two handfuls daily. They are light and easy to digest but should be eaten in moderation. - Are lotus seeds good for diabetics?
Yes, they have a low glycemic index and help manage blood sugar levels effectively. - Do lotus seeds help in weight loss?
Absolutely. Their high protein and fiber content make you feel full longer, reducing calorie intake. - Are lotus seeds safe during pregnancy?
Yes, they are considered safe and even beneficial for pregnant women due to their nutrient-rich profile. - Can I eat lotus seeds at night?
Yes, having them in the evening can help calm your nerves and promote better sleep.
Conclusion
Lotus seeds are truly one of nature’s most underrated superfoods. From supporting heart health and improving digestion to promoting glowing skin and better sleep, their benefits are countless.
Crunchy, light, and full of nutrients — lotus seeds are the perfect blend of taste and health. So next time you need a guilt-free snack, grab a handful of makhana and enjoy a boost of energy and wellness.


Health & Wellness
Kalonji Seeds Benefits: The Forgotten Black Treasure for Health, Beauty & Balance
For centuries, Kalonji has been used in Ayurveda, Unani, and traditional Middle Eastern medicine to treat everything from fatigue and indigestion to hair loss and skin issues.

Tiny but mighty — that’s how you can describe Kalonji seeds, also known as black cumin seeds or Nigella sativa. These jet-black seeds might look simple, but they carry a long history of healing, protection, and nourishment.
For centuries, Kalonji has been used in Ayurveda, Unani, and traditional Middle Eastern medicine to treat everything from fatigue and indigestion to hair loss and skin issues. Today, modern research confirms what our ancestors always knew — these seeds are loaded with powerful antioxidants, nutrients, and bioactive compounds that keep your body strong and your mind calm.
Let’s dive deep into this black gem of nature and uncover its many wonders.
Table of Contents
- 1 ???? The Ancient Story of Kalonji: A Seed Steeped in History
- 2 ⚗️ The Science Behind Kalonji: What Makes It So Powerful
- 3 ????Why Kalonji Seeds Matter in Today’s Lifestyle
- 4 ???? Everyday Benefits of Kalonji Seeds for Whole-Body Health
- 4.1 Boosts Energy and Fights Fatigue
- 4.2 Aids Digestion and Relieves Bloating
- 4.3 Strengthens Immunity
- 4.4 Supports Heart and Cholesterol Health
- 4.5 Balances Hormones and Supports Women’s Health
- 4.6 Strengthens Hair and Skin
- 4.7 Promotes Liver and Detox Health
- 4.8 Regulates Blood Sugar Levels
- 4.9 Enhances Memory and Focus
- 4.10 Protects Against Inflammation
- 5 ????️ Tasty and Simple Ways to Add Kalonji to Your Diet
- 6 ????♀️ Kalonji for Skin and Hair: The Beauty Secret Within
- 7 ????️ Kalonji Seeds vs. Kalonji Oil: Which Is Better?
- 8 ⚠️ Precautions and Possible Side Effects
- 9 ✨ The Spiritual and Ayurvedic Side of Kalonji
- 10 ???? Conclusion: A Small Seed with Infinite Power
- 11 ???? FAQs About Kalonji Seeds
???? The Ancient Story of Kalonji: A Seed Steeped in History
 Kalonji isn’t new — it’s ancient. Archaeologists discovered it in the tomb of Pharaoh Tutankhamun, showing how highly it was valued thousands of years ago. In Ayurveda, it’s known as Krishna Jiraka (black cumin), used for digestion, immunity, and energy. In Islamic medicine, Prophet Muhammad (PBUH) famously said, “Kalonji is a cure for everything except death.”
From royal kitchens to village home remedies, Kalonji has been cherished for its ability to restore balance — both physically and mentally. Even today, it continues to be a trusted natural ingredient for holistic health.
Also Read: Poppy Seeds Benefits: Tiny Seeds with Big Health Secrets
⚗️ The Science Behind Kalonji: What Makes It So Powerful
 Modern science has unlocked the mystery behind Kalonji’s healing powers. The key lies in its unique composition.
Each seed contains over 100 active compounds, including Thymoquinone (TQ) — a strong antioxidant and anti-inflammatory compound that helps your body fight toxins and stress.
Other nutrients include:
-
Essential fatty acids (Omega-3 & Omega-6) that support heart and brain health.
-
Proteins and amino acids for tissue repair and energy.
-
Iron, zinc, calcium, and potassium that maintain healthy metabolism and immunity.
-
Vitamins B1, B2, and B3 for energy and nerve support.
Together, these make Kalonji a small but complete powerhouse for your body and mind.
????Why Kalonji Seeds Matter in Today’s Lifestyle
We live in a time where stress, pollution, and processed foods are part of everyday life. These factors can weaken your immunity, slow digestion, and cause hormonal imbalance.
Kalonji acts like a natural reset button. It detoxifies your body, strengthens your immunity, and balances your energy levels. Its antioxidants help your body fight free radicals, slowing down aging and protecting vital organs like the heart and liver.
Adding just a pinch of Kalonji daily can help you feel lighter, more energetic, and mentally refreshed — naturally.
???? Everyday Benefits of Kalonji Seeds for Whole-Body Health


Instead of generic claims, let’s look at how Kalonji practically supports your daily wellness:
Boosts Energy and Fights Fatigue
Feeling low or constantly tired? Kalonji seeds help enhance oxygen supply to cells, improving energy production. The iron and B vitamins help fight tiredness naturally, giving you a sustained energy lift without caffeine.
Aids Digestion and Relieves Bloating
Kalonji has natural carminative properties that support healthy digestion. It helps relieve gas, acidity, and bloating after heavy meals. Many people take a small pinch after food as a natural digestive aid.
Strengthens Immunity
Its powerful antioxidants, especially Thymoquinone, protect the body from oxidative stress and infections. Regular use of Kalonji strengthens your immune defense, helping you recover faster and resist seasonal illnesses.
Supports Heart and Cholesterol Health
The healthy fats and antioxidants in Kalonji help lower bad cholesterol (LDL) while improving good cholesterol (HDL). This helps keep your arteries clean and supports better heart function.
Balances Hormones and Supports Women’s Health
For women, Kalonji helps regulate menstrual cycles, relieve cramps, and support hormonal balance. For men, it can improve stamina and support reproductive health.
It works naturally by supporting your endocrine system and reducing internal inflammation.
Strengthens Hair and Skin
 From dull hair to acne-prone skin, Kalonji can help restore your natural glow. It nourishes the scalp, reduces dandruff, and supports new hair growth. For the skin, it helps with acne, dark spots, and premature aging.
Promotes Liver and Detox Health
Your liver plays a vital role in cleansing toxins. Kalonji supports liver function by preventing fat buildup and oxidative stress, helping your body detox naturally and stay light.
Regulates Blood Sugar Levels
For people managing blood sugar, Kalonji helps by improving insulin sensitivity. A small daily dose (under guidance) can support balanced glucose levels.
Enhances Memory and Focus
Kalonji supports brain health by improving blood circulation and reducing inflammation. Many studies show it may help enhance memory, concentration, and overall mental clarity.
Protects Against Inflammation
Inflammation is at the root of many diseases — joint pain, diabetes, and even heart issues. Kalonji’s thymoquinone compound acts like a natural anti-inflammatory, soothing your body from within.
????️ Tasty and Simple Ways to Add Kalonji to Your Diet
 Kalonji seeds have a slightly nutty, peppery flavor — perfect for enhancing your meals. Here are some easy ways to use them daily:
-
Sprinkle on curries, lentils, or roasted vegetables.
-
Mix with honey or warm water and take on an empty stomach.
-
Add to homemade pickles, bread, or chapatis for extra taste.
-
Use Kalonji oil as a salad dressing or health tonic.
-
Blend in smoothies for a detoxifying boost.
Even a small pinch a day is enough to bring noticeable results over time.
????♀️ Kalonji for Skin and Hair: The Beauty Secret Within
For Hair
Kalonji oil is rich in nutrients that strengthen hair roots and prevent breakage. Massaging it into your scalp improves blood circulation, reduces dandruff, and supports thicker, healthier hair growth.
Mix it with coconut or castor oil for even better results.
For Skin
Its antibacterial and antioxidant properties make it excellent for clear, glowing skin. Mix Kalonji oil with aloe vera or rosewater to reduce acne, dryness, and pigmentation.
It also helps your skin heal faster from small cuts or irritation.
????️ Kalonji Seeds vs. Kalonji Oil: Which Is Better?
 Both have their place — it depends on your goal:
| Purpose | Best Form | How to Use |
|---|---|---|
| Digestion, Immunity | Seeds | Chew ½ tsp daily or add to meals |
| Skin & Hair | Oil | Apply directly or mix with carrier oils |
| Hormone & Detox | Oil | Take ¼ tsp with warm water or honey |
| Cooking | Seeds | Sprinkle in food for taste and health |
If you’re starting out, begin with seeds. They’re easier to include and mild in taste.
⚠️ Precautions and Possible Side Effects
Even natural remedies should be used mindfully.
-
Avoid taking large doses, as it may lower blood sugar or blood pressure too much.
-
Pregnant or breastfeeding women should consult a doctor before using Kalonji oil.
-
Always use pure, cold-pressed Kalonji oil to avoid harmful additives.
Moderation is key — small amounts give the best results.
✨ The Spiritual and Ayurvedic Side of Kalonji
 In Ayurveda, Kalonji is known as a “Sattvic” seed — meaning it promotes balance, awareness, and mental clarity.
Its deep black color symbolizes protection and grounding. It’s said to cleanse not just the body, but the mind and aura, helping release negativity and build inner strength.
That’s why Kalonji is often used in meditation rituals and detox programs — it helps bring calm and focus.
???? Conclusion: A Small Seed with Infinite Power
Kalonji seeds remind us that nature’s most powerful gifts often come in the smallest packages. Whether you use them for energy, beauty, or overall wellness, they bring centuries of wisdom into your daily life.
By adding a pinch of these black seeds to your food or using their oil in your self-care rituals, you can enjoy stronger immunity, glowing skin, and renewed vitality — naturally.
Simple. Ancient. Effective.
That’s the beauty of Kalonji.
???? FAQs About Kalonji Seeds
1. Can I take Kalonji every day?
Yes, ½ teaspoon of seeds or a few drops of oil daily is safe and beneficial for most people.
2. What is the best time to consume Kalonji?
Morning on an empty stomach or before meals is ideal for better absorption.
3. Can Kalonji help with hair fall?
Absolutely! Regular scalp massages with Kalonji oil can strengthen hair roots and reduce breakage.
4. Does Kalonji help in weight loss?
It supports metabolism and detoxification, which can naturally aid weight management when paired with a healthy diet.
5. Is Kalonji safe for children?
Yes, in very small quantities mixed in food, but avoid giving oil directly.
6. Can I use Kalonji oil on my face daily?
Yes, but always mix it with a carrier oil like coconut or almond oil to avoid irritation.
Health & Wellness
Fennel Seeds Benefits: A Super Spice for Digestion, Hormone Balance & Overall Wellness
Fennel seeds those tiny greenish-brown seeds you often find at restaurants or after meals in Indian homes — are far more than a refreshing mouth freshener.
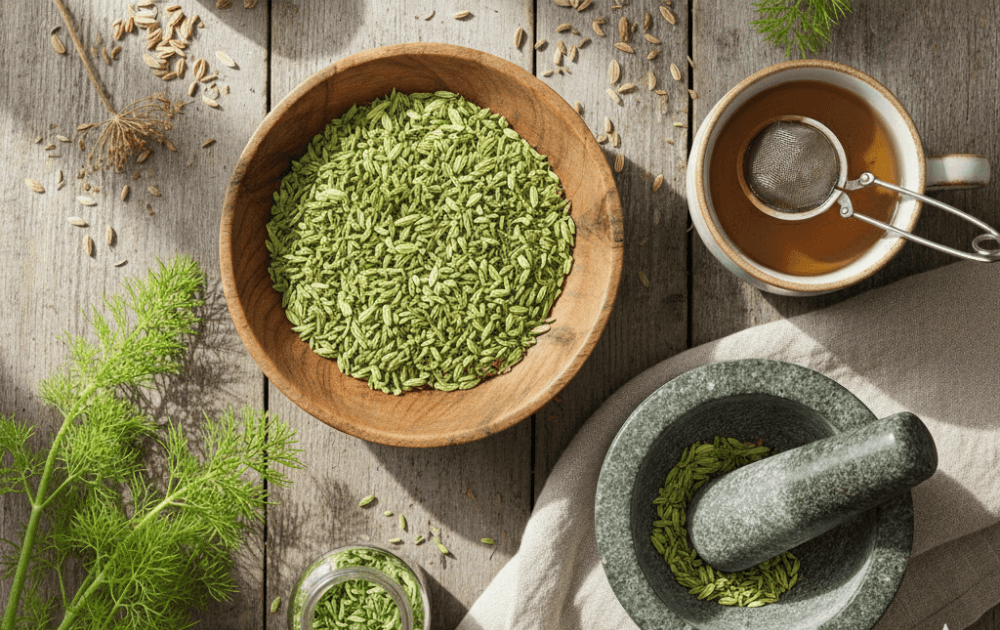
Fennel seeds — those tiny greenish-brown seeds you often find at restaurants or after meals in Indian homes — are far more than a refreshing mouth freshener. Scientifically known as Foeniculum vulgare, these seeds are a treasure trove of nutrients, antioxidants, and plant compounds that have been valued in Ayurveda, Chinese medicine, and ancient Greek therapies for centuries.
From easing digestion and regulating hormones to supporting weight loss and enhancing skin health, fennel seeds are a true superfood in disguise. Let’s dive deep into why you should make them a regular part of your daily wellness routine.
Table of Contents
- 1 ???? What Are Fennel Seeds?
- 2 Nutritional Profile of Fennel Seeds
- 2.1 ???? 1. Aids Digestion and Relieves Bloating
- 2.2 ???? 2. Regulates Hormonal Imbalance in Women
- 2.3 ????♀️ 3. Supports Weight Loss and Metabolism
- 2.4 ???? 4. Improves Skin Health and Complexion
- 2.5 ????️ 5. Strengthens Immunity
- 2.6 ❤️ 6. Promotes Heart Health
- 2.7 ???? 7. Improves Respiratory Health
- 2.8 ????️ 8. Enhances Eye Health
- 2.9 ???? 9. Boosts Brain Function and Mood
- 2.10 ???? 10. Acts as a Natural Detoxifier
- 3 How to Use Fennel Seeds for Maximum Benefits
- 4 Possible Side Effects and Precautions
- 5 FAQs About Fennel Seeds
- 6 Conclusion
???? What Are Fennel Seeds?
 Fennel seeds come from the fennel plant, a fragrant herb from the carrot family. The plant’s bulb, stalks, and seeds are all edible and used in various cuisines worldwide. The seeds have a slightly sweet, licorice-like taste and an aroma similar to anise — which makes them both a culinary delight and a natural medicine.
In Ayurveda, fennel seeds (called Saunf) are classified as “tridoshic,” meaning they balance all three doshas — Vata, Pitta, and Kapha. They are cooling, mildly sweet, and soothing to the digestive and nervous systems.
Nutritional Profile of Fennel Seeds
Fennel seeds are low in calories but rich in essential nutrients. A tablespoon of fennel seeds contains:
- Fiber: Supports gut health and aids digestion
- Potassium: Helps regulate blood pressure
- Magnesium & Calcium: Strengthen bones and support muscle function
- Vitamin C: Boosts immunity and collagen production
- Anethole: The active compound with anti-inflammatory and hormone-balancing properties
This impressive nutrient profile explains why fennel seeds have been valued for centuries in traditional medicine systems like Ayurveda and Unani.
???? 1. Aids Digestion and Relieves Bloating
 Perhaps the most well-known benefit of fennel seeds is their ability to soothe the digestive system. The volatile oils in fennel seeds — such as anethole, fenchone, and estragole — help stimulate the secretion of gastric juices and enzymes, making it easier to digest food and absorb nutrients.
They also relax the smooth muscles of the gastrointestinal tract, preventing gas formation and bloating. That’s why chewing fennel seeds after a meal or drinking fennel tea can instantly ease indigestion and heartburn.
???? Tip: Combine fennel seeds with cumin and carom seeds (jeera and ajwain) for a potent digestive mix.
Also Read: Low-Acid Superfoods For Acid Reflux: Gut Health Remedies
???? 2. Regulates Hormonal Imbalance in Women
Fennel seeds contain phytoestrogens, natural compounds that mimic the hormone estrogen. These compounds help regulate menstrual cycles, ease cramps, and reduce PMS and menopausal symptoms like hot flashes or mood swings.
In some studies, fennel seed extract has been shown to reduce excessive hair growth (hirsutism) and improve hormonal acne, particularly in women with PCOS.
???? For Women’s Wellness: Drinking fennel seed tea daily can naturally support hormonal balance and reproductive health.
????♀️ 3. Supports Weight Loss and Metabolism
Trying to shed extra pounds? Fennel seeds might be the gentle aid you’re looking for. They act as a natural appetite suppressant and metabolism booster. The fiber content keeps you full for longer, while their mild diuretic nature helps flush out excess water and toxins.
A glass of fennel water in the morning can activate digestion and reduce water retention. The seeds’ antioxidants also help reduce oxidative stress, which plays a role in obesity and slow metabolism.
???? Morning Detox Tip: Soak 1 tablespoon of fennel seeds overnight in water. Strain and drink on an empty stomach.
???? 4. Improves Skin Health and Complexion
 The antioxidants in fennel seeds — especially vitamin C, quercetin, and kaempferol — protect skin cells from damage caused by free radicals and UV exposure. Regular intake helps purify the blood, prevent acne, and promote a glowing complexion.
Fennel also helps balance hormones, which can reduce hormonal acne. Its antibacterial and anti-inflammatory properties make fennel tea or fennel-infused water a great natural toner.
✨ DIY Tip: Rinse your face with cooled fennel seed water to reduce puffiness and soothe irritation.
????️ 5. Strengthens Immunity
Fennel seeds are packed with vitamin C, antioxidants, and antimicrobial compounds that support a strong immune response. They help your body fight infections, reduce inflammation, and speed up recovery during seasonal changes.
Drinking fennel tea regularly can also relieve cold, sore throat, and cough symptoms due to its soothing and expectorant effects.
❤️ 6. Promotes Heart Health
High levels of fiber, potassium, and antioxidants make fennel seeds a friend to your heart. Potassium helps balance sodium levels, keeping blood pressure in check. Meanwhile, dietary fiber helps lower LDL (“bad”) cholesterol and prevent arterial blockages.
Regular fennel consumption supports healthy circulation and reduces the risk of hypertension and heart disease.
???? 7. Improves Respiratory Health
Feeling congested or dealing with a persistent cough? Fennel seeds can help clear mucus and ease breathing. Their natural expectorant properties help loosen phlegm and soothe inflammation in the airways.
In traditional medicine, fennel tea is used to treat bronchitis, asthma, and sore throats. It’s especially helpful when combined with honey and ginger.
????️ 8. Enhances Eye Health
Fennel seeds have long been used in Ayurvedic practices to maintain clear vision. Their vitamin A and antioxidant content reduce oxidative stress on eye cells and may help prevent cataracts and age-related macular degeneration.
Some natural healers even use cooled fennel seed water as an eye rinse to reduce eye strain and redness (ensure it’s filtered and clean before use).
???? 9. Boosts Brain Function and Mood
The nutrients in fennel seeds — including potassium, folate, and antioxidants — help maintain healthy brain function. Potassium supports proper nerve transmission, while fennel’s essential oils can have a mild calming effect on the nervous system.
Fennel tea can also reduce anxiety, mental fatigue, and irritability, making it an ideal evening beverage for relaxation.
???? 10. Acts as a Natural Detoxifier
Fennel seeds work as a gentle natural detox. They increase urine output and help the body flush out waste products and toxins. This process supports kidney function and helps reduce water retention and bloating.
Their antioxidant-rich composition also helps the liver process harmful substances more efficiently.
How to Use Fennel Seeds for Maximum Benefits
 Here are some simple and effective ways to include fennel seeds in your daily routine:
- Fennel Water: Soak 1 tablespoon of fennel seeds overnight in a glass of water. Strain and drink it on an empty stomach in the morning.
- Fennel Tea: Boil 1 teaspoon of fennel seeds in a cup of water for 5–7 minutes. Strain and enjoy warm for digestive relief.
- Chew After Meals: Chew a teaspoon of roasted fennel seeds after meals to aid digestion and freshen breath.
- Smoothies or Salads: Add crushed fennel seeds to smoothies, soups, or salads for a subtle sweet flavor and health boost.
Possible Side Effects and Precautions
While fennel seeds are generally safe, excessive consumption may cause:
- Mild allergies or sensitivity in some individuals
- Hormonal interference for those on medication (consult your doctor if pregnant or breastfeeding)
- Digestive discomfort if consumed in large quantities
Moderation is key — 1–2 teaspoons a day is usually sufficient for health benefits.
FAQs About Fennel Seeds
Q1. Can fennel seeds help with bloating?
Yes, fennel seeds help relax stomach muscles and relieve gas, making them effective against bloating and indigestion.
Q2. Are fennel seeds good for hormonal balance?
Absolutely. The compound anethole in fennel mimics estrogen and supports hormonal health, especially in women.
Q3. Can fennel seeds aid in weight loss?
Yes, they can. Fennel seeds reduce appetite, improve metabolism, and flush out toxins, aiding in natural weight management.
Q4. Is fennel water safe to drink daily?
Yes, one glass of fennel water daily is safe for most people. It helps detoxify your system and supports digestion.
Q5. Can men consume fennel seeds?
Yes, fennel seeds are equally beneficial for men — they support digestion, heart health, and may even enhance stamina.
Conclusion
Fennel seeds may be small, but their benefits are mighty. From improving digestion and balancing hormones to enhancing skin health and immunity, they truly deserve a place in your daily wellness routine. Whether you sip fennel tea, chew them after meals, or infuse them in water — this aromatic spice is your simple, natural route to better health.
So the next time you enjoy that refreshing Saunf after a meal, know that it’s doing more for you than just freshening your breath — it’s nourishing your body from within! ????✨
